

You can think of uv mapping as pealing an orange and stapling the pieces flat on the table...
First, switch to the Bodypaint UV Editor layout.
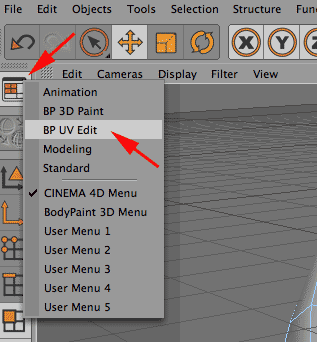
and run the Paint Setup Wizard. in step 1 make sure only your low res object is selected. In step 3 set texture size minimum and maximum to 1024. use default settings for everything else.

Click the UV Polygon Edit tool and you should see the default UV layout on the right side of your screen (if not, go to the File menu and Save Texture).
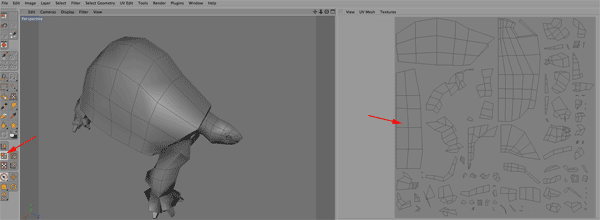
This is a perfectly functional UV polygon layout, but in practical terms it has a few problems. First, we are going to try to minimize seams. When we apply a texture to each polygon, we want everything to match up perfectly on the rendered object. This layout has a few dozen polygon groups and countless seams to worry about when we construct our textures. Second, we want to group polygons by texture. We will have two main textures on this model, the shell and the skin, and we want to group them accordingly. Last, we want to size polygons based on how likely they are to be seen. For instance, the underside of the shell will rarely, if ever, be seen, so we don't want to spend as much real estate on this as we will for top of the shell, which will be the most visible part of the object. Size will translate into resolution, so we don't want to waste space on unseen areas.
So let's jump in...use the Live Selection tool to select all of the polygons on the top of the shell.
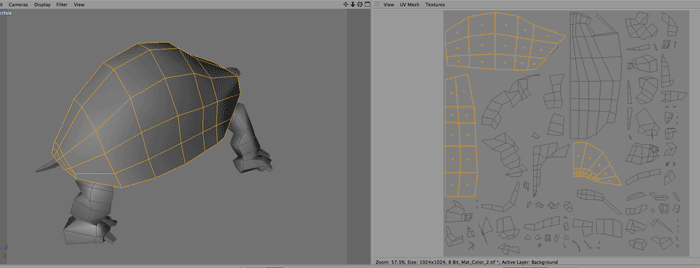
Switch to top view to see the top of the shell and in the Attribute editor go to UV Mapping tab and it's Projection tab, and hit the Frontal buttton. To the right you see the shell polygons rearranged in the UV editor as they appear to the camera.
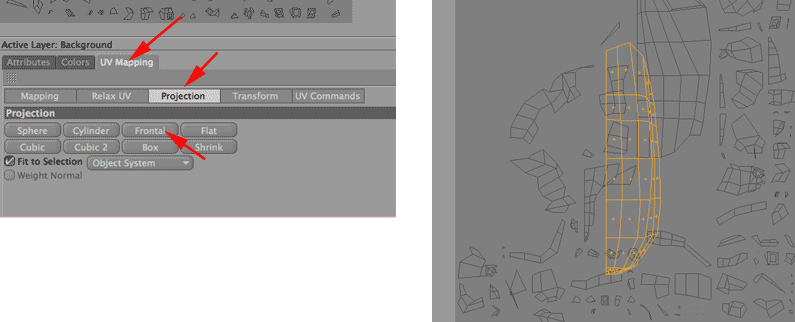
We see a problem with this projection on the right side of the shell. These vertical polygons appear too narrow. What we need is a function that would squash this flat while trying to maintain the relative size and shape of the individual polygons. Fortunately the Relax UV function does just this.
To the left of the Project tab is the Relax UV tab. While the shell polygons are still selected, choose this option make sure Pin Border Points is not checked, and hit Apply.
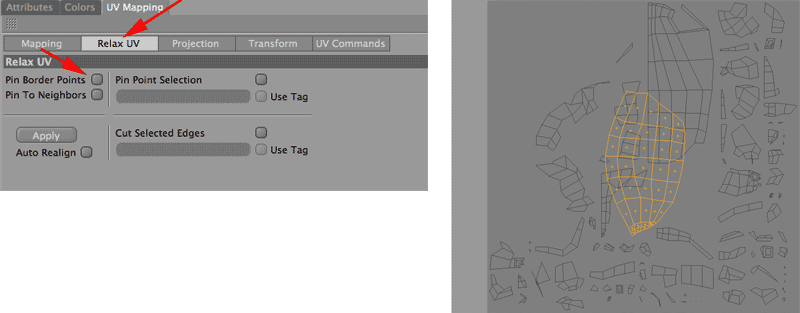
While these polygons are still selected, use the Move tool to move this off of the dark gray square.
Now select the rest of the shell. Try to get all of polygons under the edge...this isn't easy, but if you miss a few we can stitch them in later.

Again, go to top view and do another frontal protection and move the result off to the left...
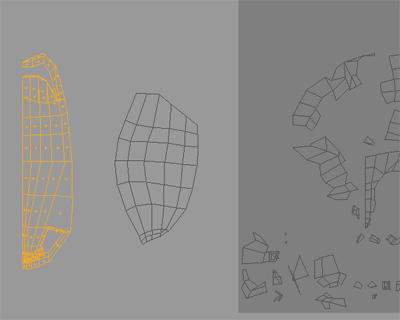
Using Relax UV does not give us a result that is consistently proportional...
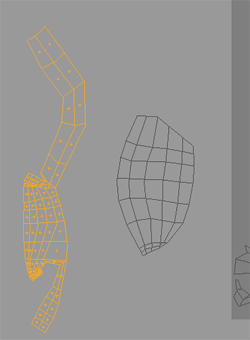
So cntl-Z back out of the the Relax UV and use the Live Selection and Move tool to separate the upper and lower portion of the under shell in the UV edit window and then run Relax UV on each of the three separate polygon groups...
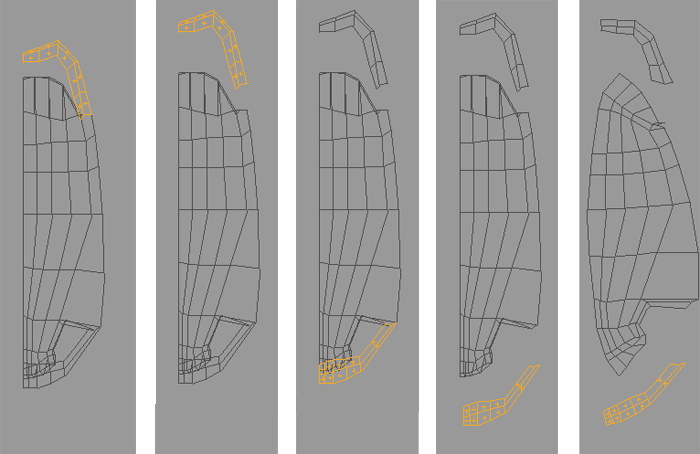
The leg is trickier. There are a number of ways to do this, but the method that works best of me is to do frontal projections on several portions of the leg and stitch the results together.
Skipping the toe nails an the bottom of the foot, select the polygons below, orient the camera roughly as shown and do a Frontal Projection. Use the Move tool to slide the result off to the left. Then use Relax UV...
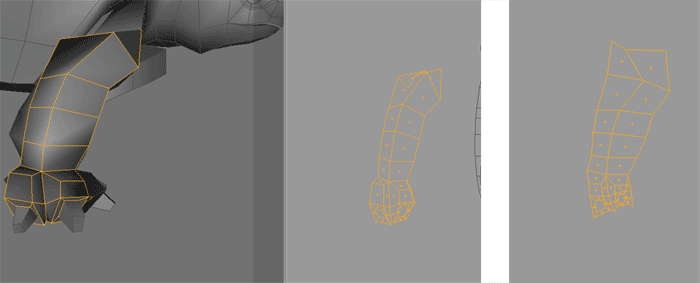
Repeat this process as you rotate around the leg...
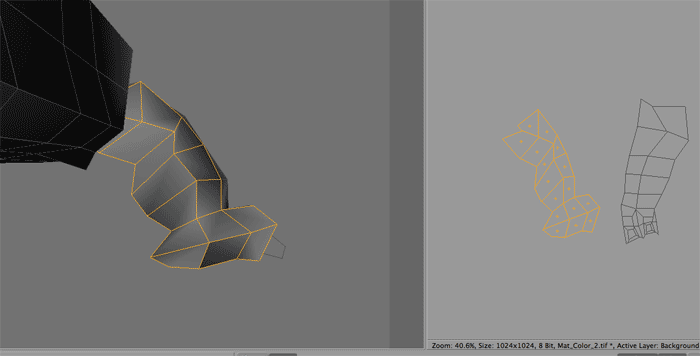
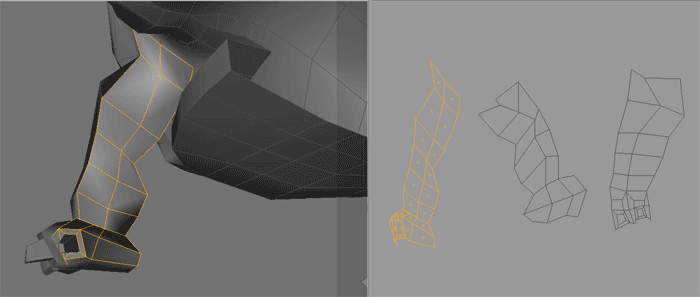
Now select each of the three groups and use the Move, Rotate and Scale tools to line up these 3 polygon groups so that adjacent edges are as close as possible (overlapping is fine)...

Now switch to the UV Point Edit tool and select the points which we want to stitch together...
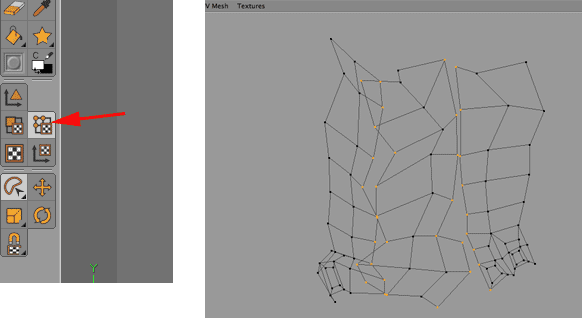
Under the UV Command tab hit UV Terrace to connect the points....
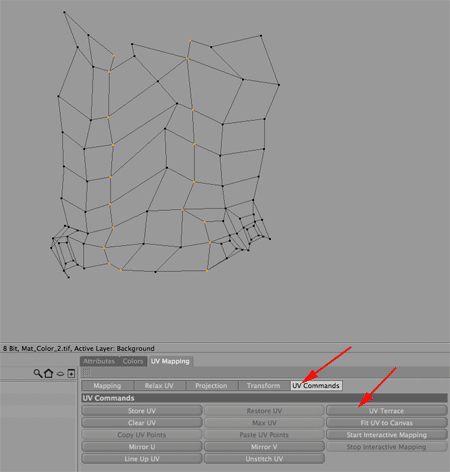
Since I'm not happy with the results of Relax UV I'll solve the few overlaps by individually moving points. Finally, I didn't want the seam in the front of the leg where it will be fairly obvious, so I'll move the left strip of polygons to the right of the group and use UV Terrace once more to stitch the results.
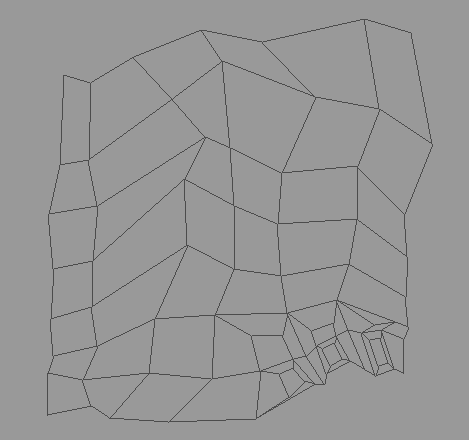
Repeat this process for the rear leg.
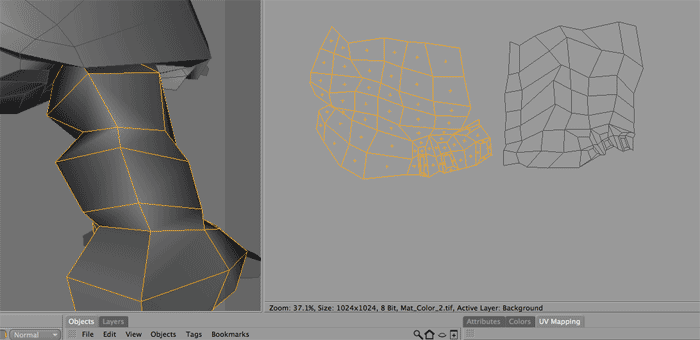
The head is a little more straight forward. First, like the underside of the shell, we aren't all that interested in the inside of the mouth. Let's map that first so it doesn't interfere withthe rest of the head and move it off to the side.
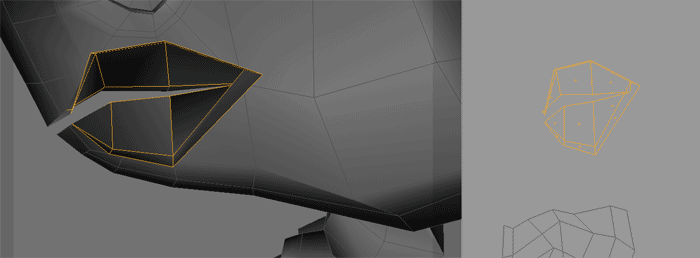
Next select the rest of the head and do a frontal projection...
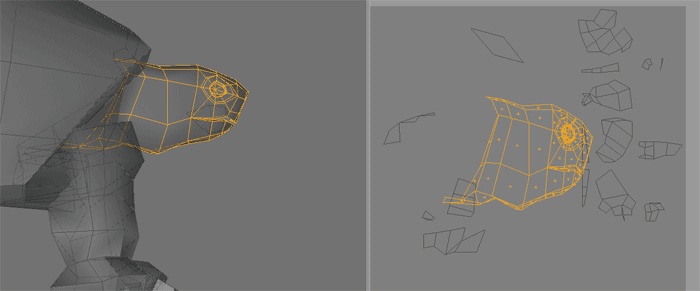
Move the polygon group off to the side and use Relax UV.
Which will give you an error about degenerate polygons...the offending polygons (triangles at the back of the eye) remain highlighted. Move these out of the way (I should fix them...but I'm not sure what the problem is) and try Relax UV again.
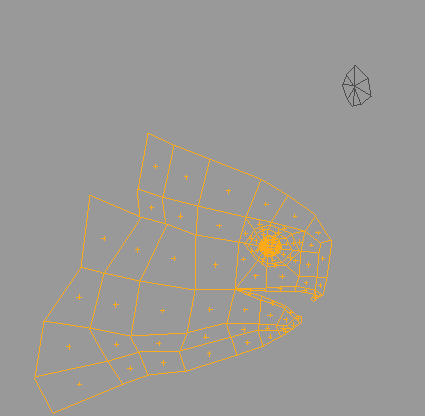
Select the dark gray square in the UV Edit Window to see all of the polygons that are left. These are mainly the skin around the front and back of the turtle, the toenails and the bottom of the feet. Use methods described above to project these and move them out of the dark gray square.

If you still have polygons in the dark gray square, you need to find their adjacent polygons and stitch them in to an existing group.
Now that we've moved everything out and grouped them in a way that is suitable for our object, we need to move all of the polygon groups back into the dark gray square. Start with the most importantpieces...upper shell, head and legs.
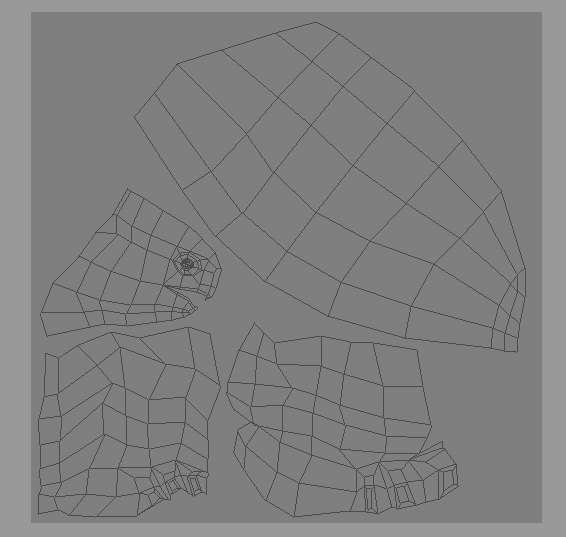
Now fill the open areas with front and tail sections. To help fit the groups together, look for sections to break off or possibly merge with over groups...

Then stick in the leftovers. Pieces that will have the same color and no important details, like the toenails and the bottom of the feet and can be placed on top of each other. Pieces like the mouth or inner eye that will be one solid color can be scaled to an extremely small size. In any event, try to use as much space as in available, while leaving a fair buffer around each polygon group.

Now we need generate a file with highlighted polygon information which can be sent to Photoshop. Select the Brush Tool and in the Attribute Editor set the brush Size to 1...

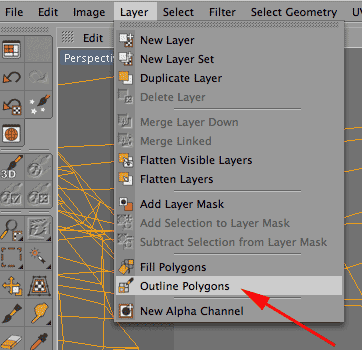
Then select all the polygons in the UV editor and use Layout->Outline Polygons.
Then run File->Save Texture As to save the polygon info your choice of file. Then take this into Photoshop.