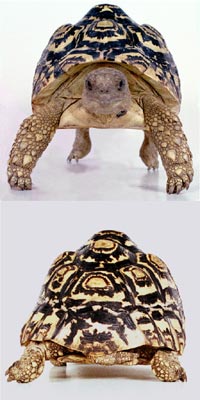

The easiest way to obtain correct proportions when modeling is to work directly from a series of image planes (top, side, front). These can either be hand drawn or from a photo reference. In the example below, I'm working from the following images I found on flickr.com (used with permission).
 |
 |
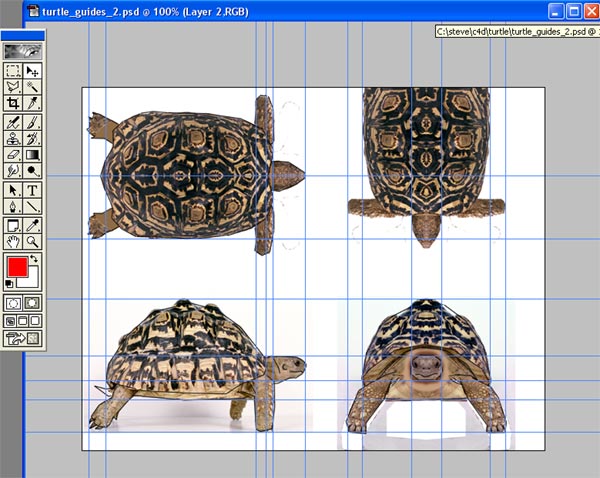
Even though these are really great source images, you are still going to have to do a little surgery to get everything consistent (legs matching in different views, adjusting to compensate for the perspective of the front view, etc). Also, we will be using the symmetry tool to model, so we also want symmetrical views of the turtle:

One way to insure that the features of your model are consistent across views is to use Photoshop guides (under the View menu). If you are doing hand drawn images, a T-square works just as well.
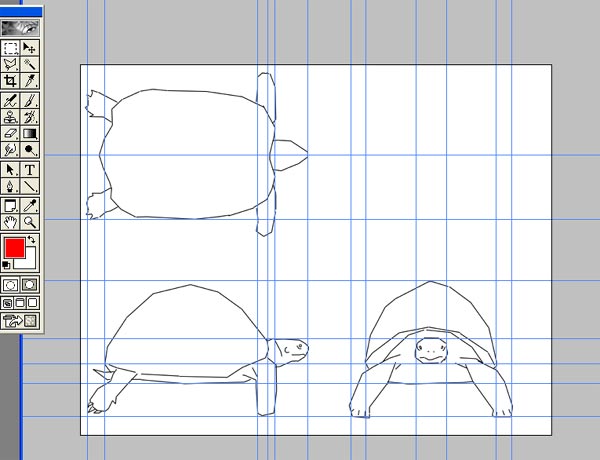
Next you want to outline important features. I try not to put in too much detail, or too fine a level of detail...just enough to give you the overall proportions of the model.

Now gray the image out a little (adjust brightness down) and cut it up into the 3 jpegs and open Cinema4D.
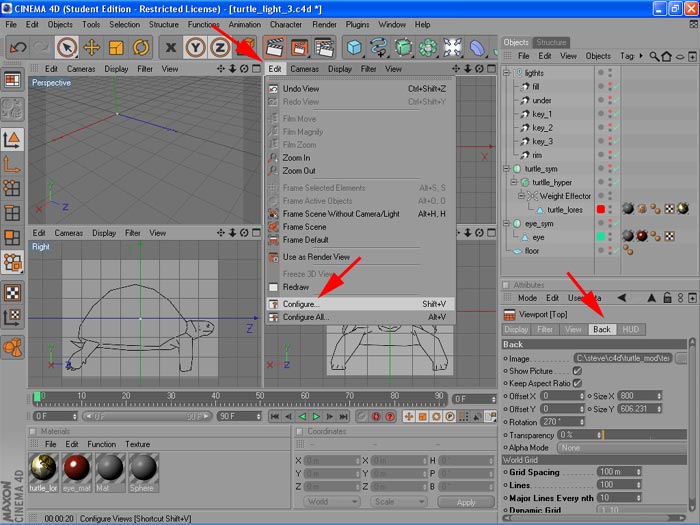
Each of the four main image windows has it's own Edit menu, click on this and Configure. In the attribute window click on Back. This is where you'll add the image plane. Under Image load the jpeg for (in this case) the top view. Pay attention to which direction the head is pointing in the top and side views...you'll want this to be consistent in all images. You will probably have to play with the rotate or scale everything to match up.
